

Pine trees are a symbol of strength and resilience. Their towering presence and evergreen foliage make them a cherished addition to landscapes around the world. Growing a pine tree from a cone can be a rewarding and educational experience that allows you to connect with nature on a deeper level. In this comprehensive guide, we’ll explore the fascinating journey of growing a pine tree from a tiny cone, step by step.
Why Choose Pine Trees?
Pine trees, belonging to the genus Pinus, are renowned for their adaptability, longevity, and ecological significance. They serve as habitats and sources of food for various wildlife species and play a crucial role in stabilizing soil and preventing erosion. Additionally, they offer many practical benefits, such as providing shade, reducing energy costs, and enhancing the aesthetic appeal of your property.
Getting Started
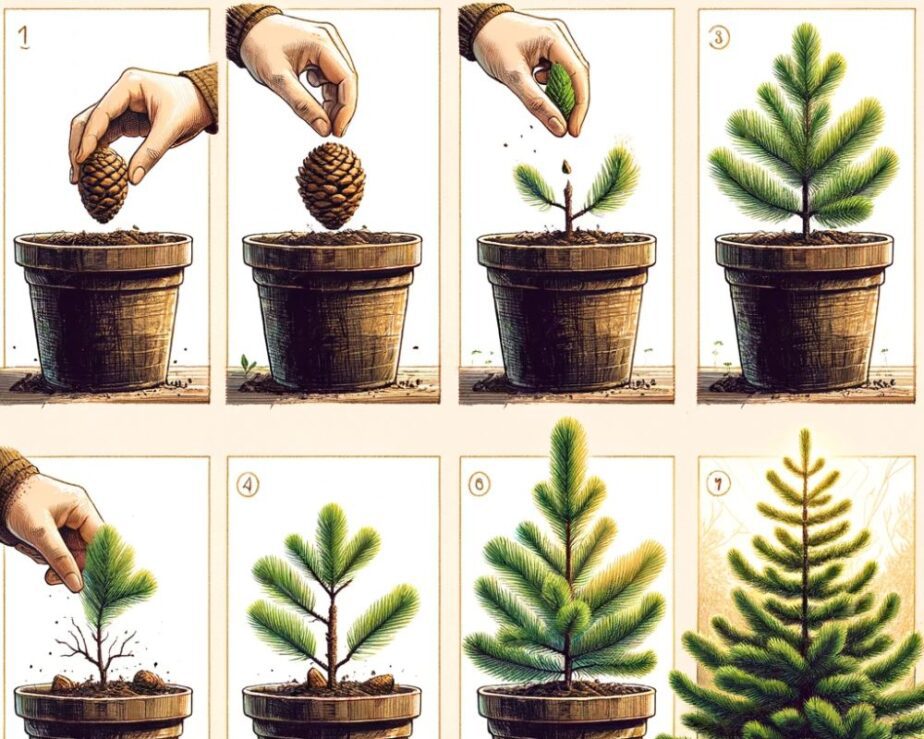
Collecting Pine Cones: The first step in growing a pine tree from a cone is to collect healthy pine cones. Look for mature cones that are brown and fully developed. Avoid cones that appear damaged, diseased, or prematurely opened.
Preparing the Cones: Before planting, you need to prepare the pine cones to extract their seeds. Place the collected cones in a warm, dry area for a few days to facilitate cone opening. You can also speed up the process by baking the cones in the oven at a low temperature for about 20 minutes.
Extracting the Seeds: Once the cones have opened naturally or have been baked, remove the seeds carefully. Pine seeds are usually found under the scales of the cone. Gently pry the scales apart to reveal the seeds hidden within.
Seed Preparation
Stratification: Pine seeds require a process called stratification to simulate natural conditions that prepare them for germination. Place the seeds in a plastic bag with a damp paper towel and store them in the refrigerator for 30-60 days. This mimics the cold, moist conditions they would experience in their natural habitat.
Planting the Pine Seeds
Selecting the Right Location: Choose a suitable location for planting your pine seeds. Pine trees generally thrive in well-drained soil with good sunlight. Consider the specific pine species you’re growing, as some may have unique requirements.
Soil Preparation: Prepare the soil by loosening it and removing any weeds or debris. Ensure it has good drainage to prevent waterlogging, which can harm the seeds.
Planting: Plant the stratified pine seeds about 1 inch deep in the soil. Space them at least a few inches apart to allow room for growth. Water the area gently after planting to settle the soil and provide moisture.
Caring for Young Pine Trees
Watering: Pine trees require consistent moisture during their early stages of growth. Keep the soil consistently damp but not waterlogged. A drip irrigation system or soaker hose can be helpful.
Mulching: Apply a layer of mulch around the young pine trees to conserve soil moisture, suppress weeds, and regulate soil temperature.
Protecting from Wildlife: Pine seeds and young seedlings can be vulnerable to wildlife like squirrels and deer. Use protective measures like fencing or netting to deter animals from damaging your trees.
Pruning and Shaping: As your pine trees grow, consider pruning to maintain their shape and encourage healthy growth. However, avoid heavy pruning during their early years.
Conclusion
Growing a pine tree from a cone is a fulfilling journey that allows you to connect with nature and contribute positively to the environment. By following these steps and providing the proper care, you can watch your tiny pine cone transform into a majestic and resilient pine tree, enhancing the beauty and ecological value of your surroundings. Remember that patience and dedication are key, as pine trees take several years to reach their full potential. As you embark on this journey, you’ll not only be nurturing a tree but also fostering a deeper connection with the natural world.
